NiCE Digital messaging in the Salesforce Voice omni-channel widget
The Enhanced Omni-Channel widget lets agents in the CXone Agent app for Salesforce Voice handle NiCE Digital messaging conversations (chat, SMS, WhatsApp, and Facebook Messenger) alongside voice calls, in a single workspace. NiCE's routing engine delivers each digital interaction to the widget so agents can review session details, reply, transfer, and close conversations without switching between tools. When a customer sends a message through a NiCE Digital channel, Omni-Channel routing delivers it to an available, qualified agent's Inbox, based on real-time skills and capacity.
Review a messaging session
-
Open a messaging session record.
-
On the Conversation tab, review the message thread, and use the Reply to message field to respond to the customer.
-
Click Send icon.
-
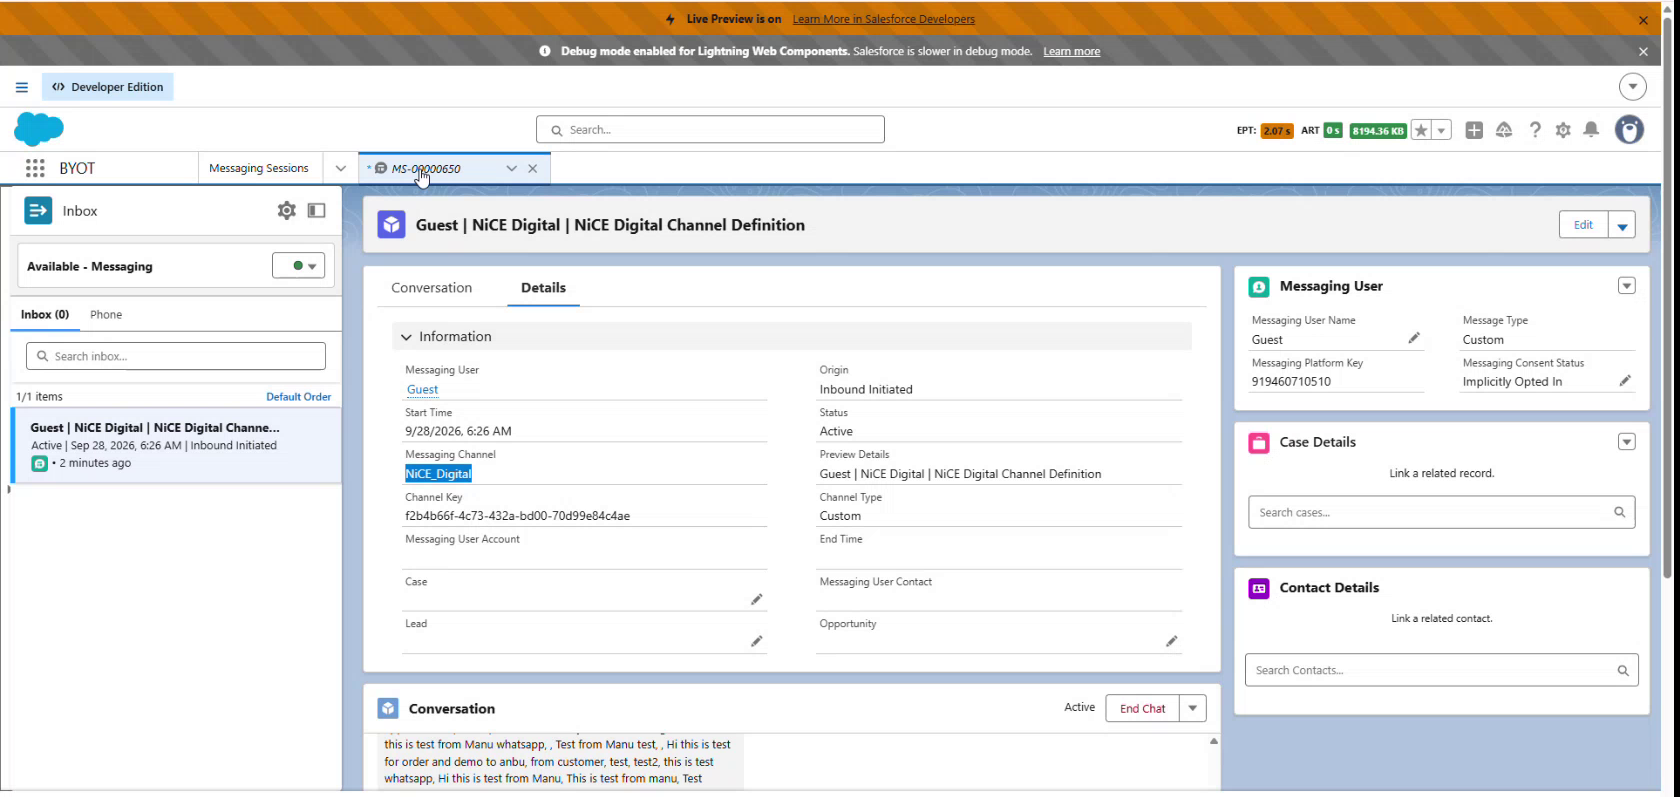
Click the Details tab to review session metadata.
 View image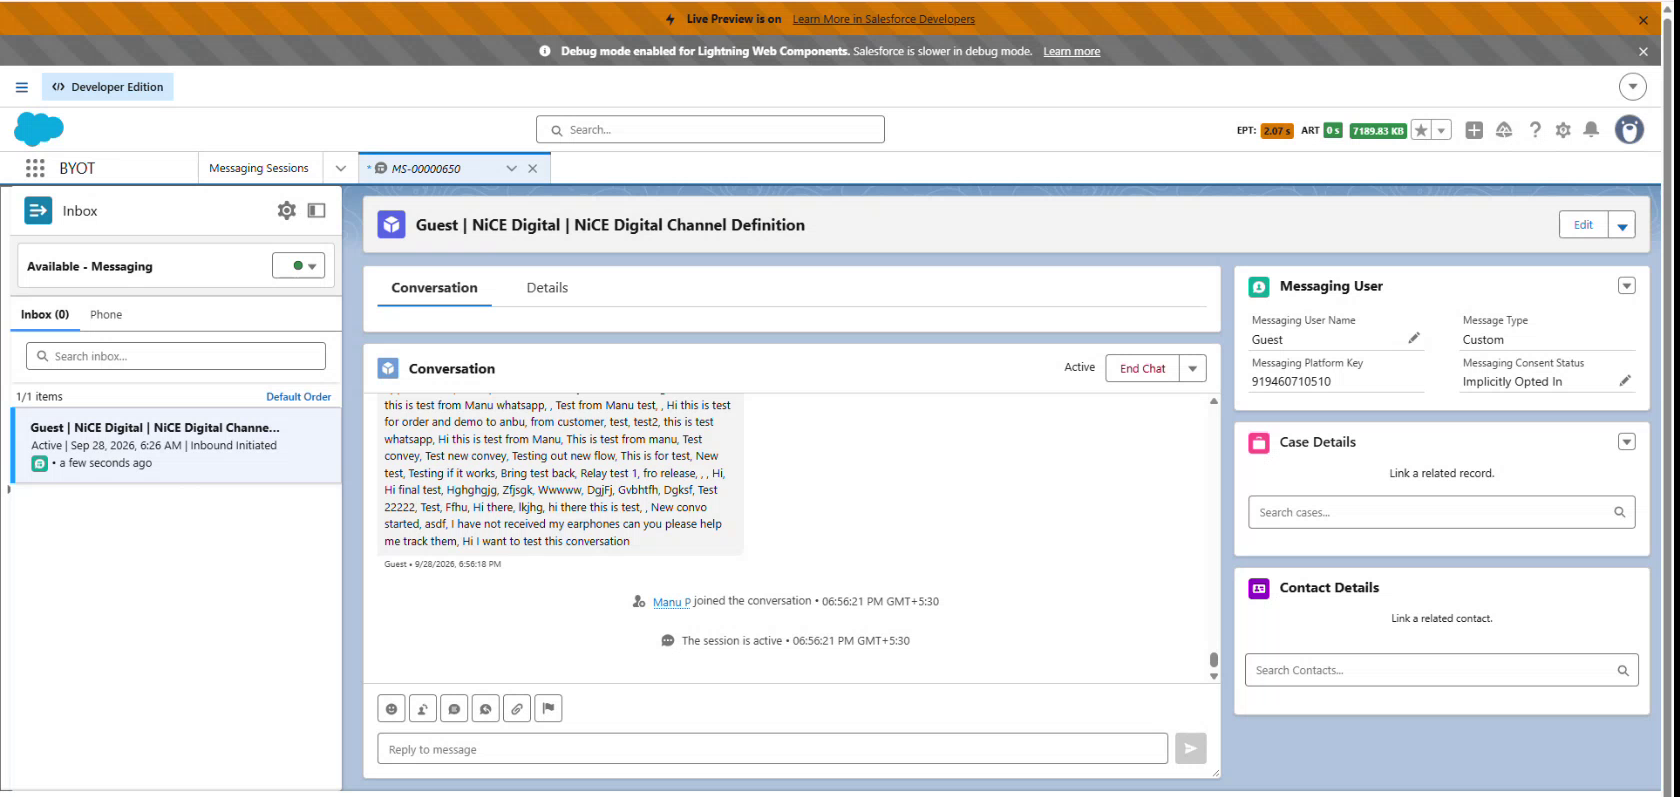
Transfer a conversation
-
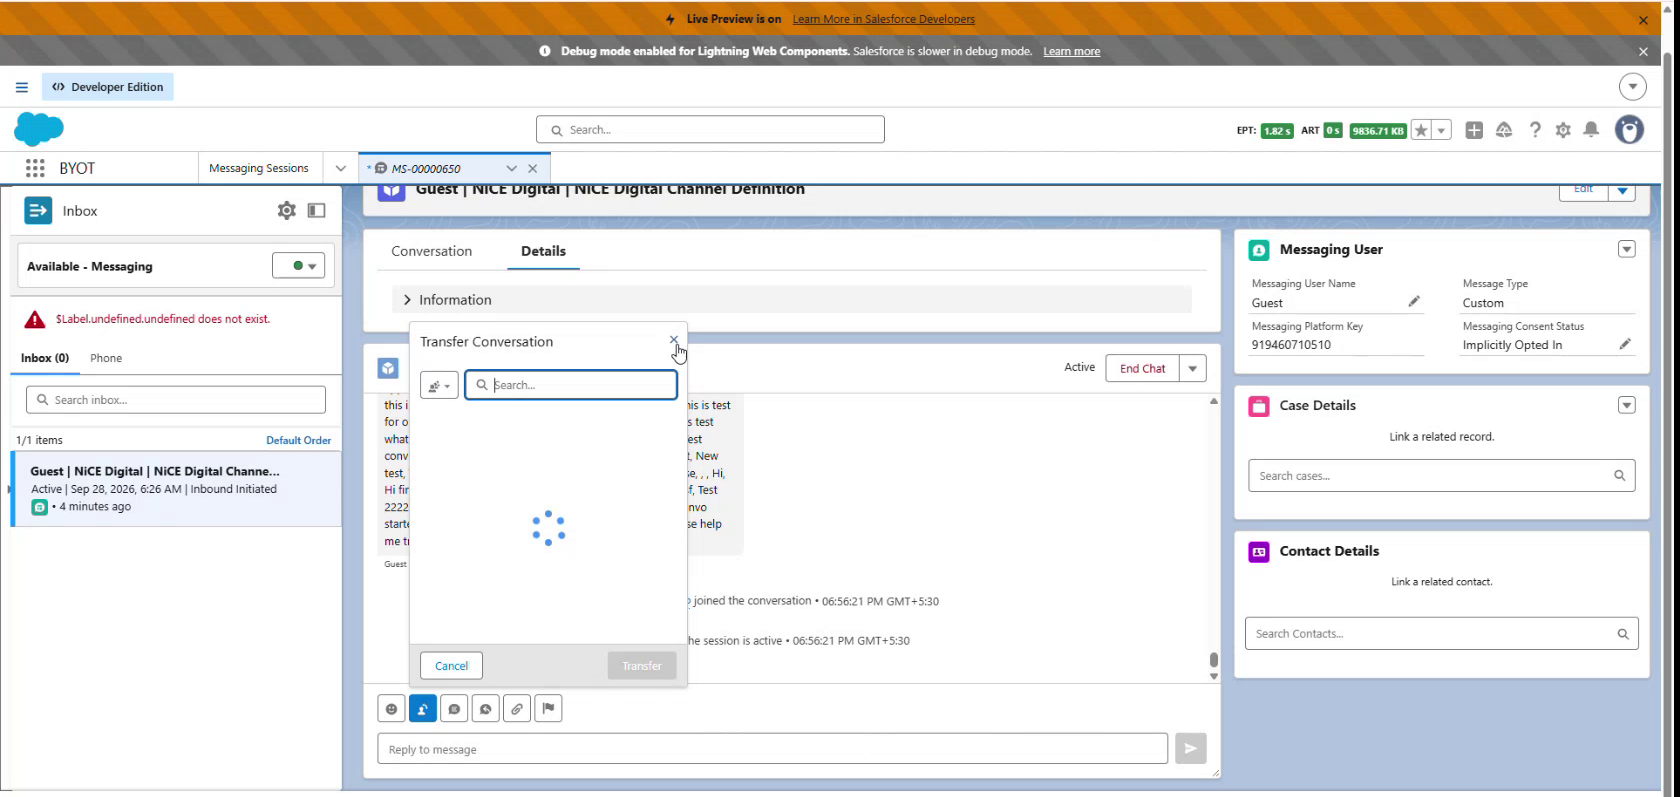
In an open messaging session, click the Transfer icon, above the reply field.
-
In the Transfer Conversation dialog, use Search to find a transfer destination.
-
Click Transfer, or click Cancel to close the dialog without transferring the conversation.
Create a quick text reply
-
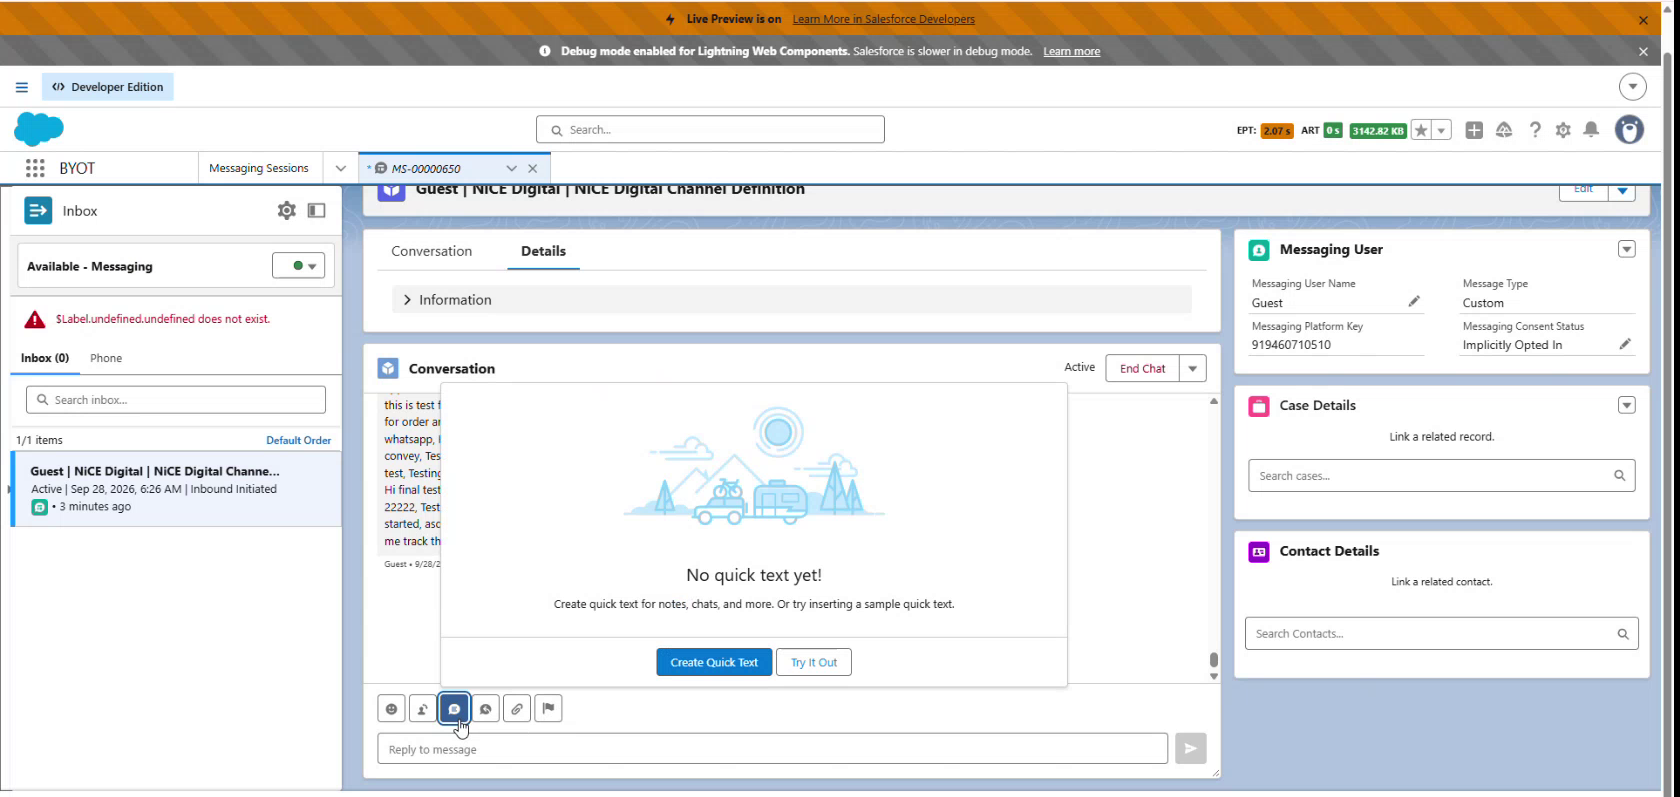
In an open messaging session, click the Quick Text icon, above the reply field.
-
Click Create Quick Text.
-
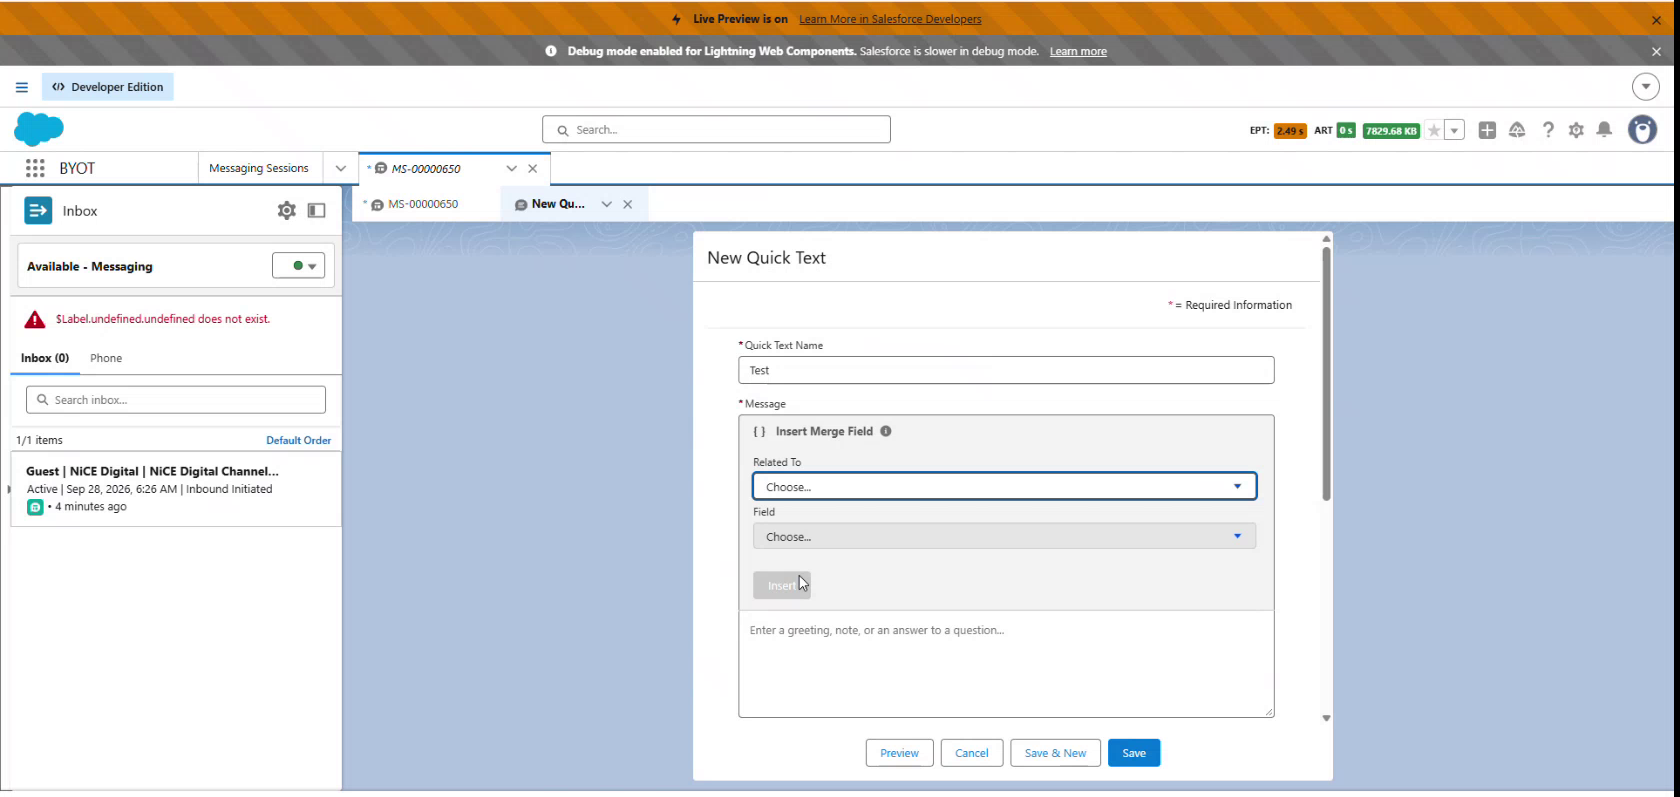
On the New Quick Text page, enter a Quick Text Name.
-
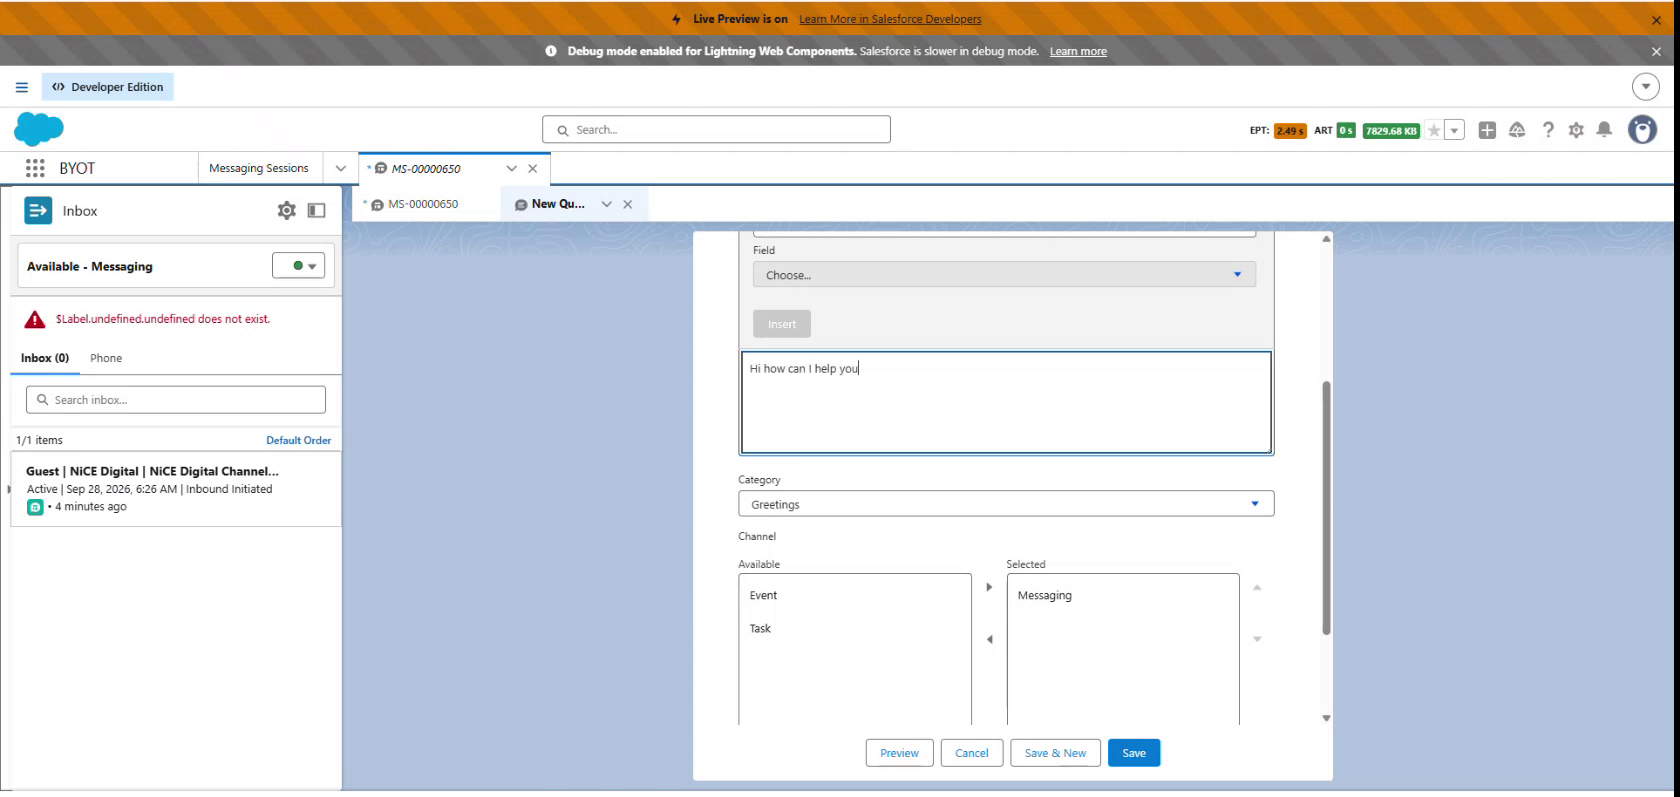
In the message field, enter the reply text.
-
Under Category, choose a category, for example, Greetings.
-
Under Channel, confirm Messaging is listed under Selected.
-
Click Save.
Attach a file to a conversation
-
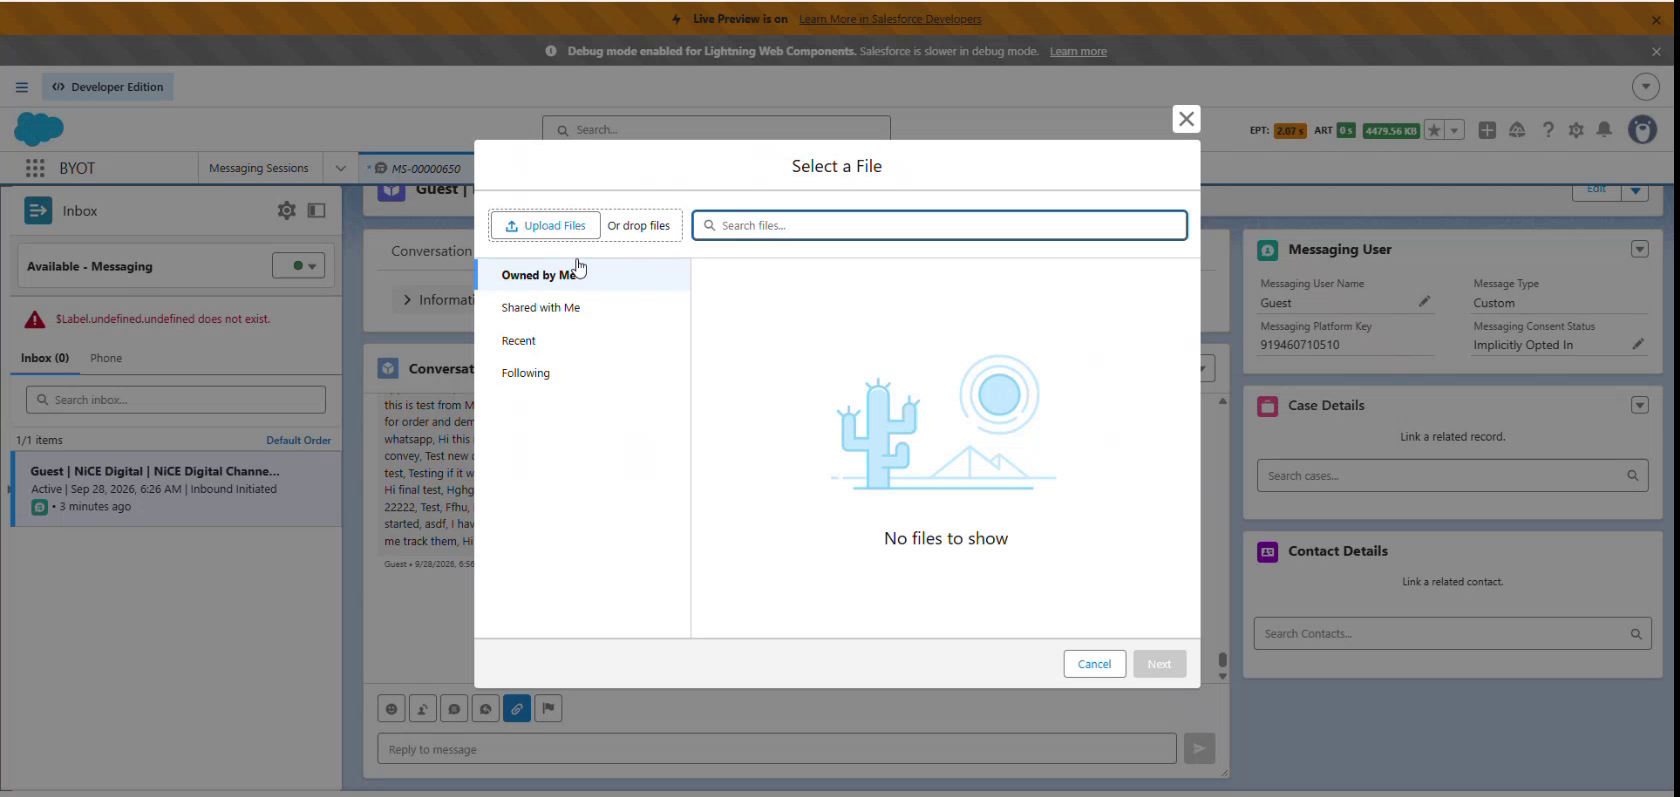
In the chat window, click the Attachment icon.
-
Do one of the following:
-
Click Upload Files and select a file from your computer.
-
Drag and drop a file into the upload area.
-
-
Click Next.
-
In the Link Expiration Date box, set the date after which the customer can no longer access the file. Do one of the following:
-
Select a date from the calendar.
-
Type a date directly in the date field.
-
-
Click Insert.
-
Click Send.
End a chat session
-
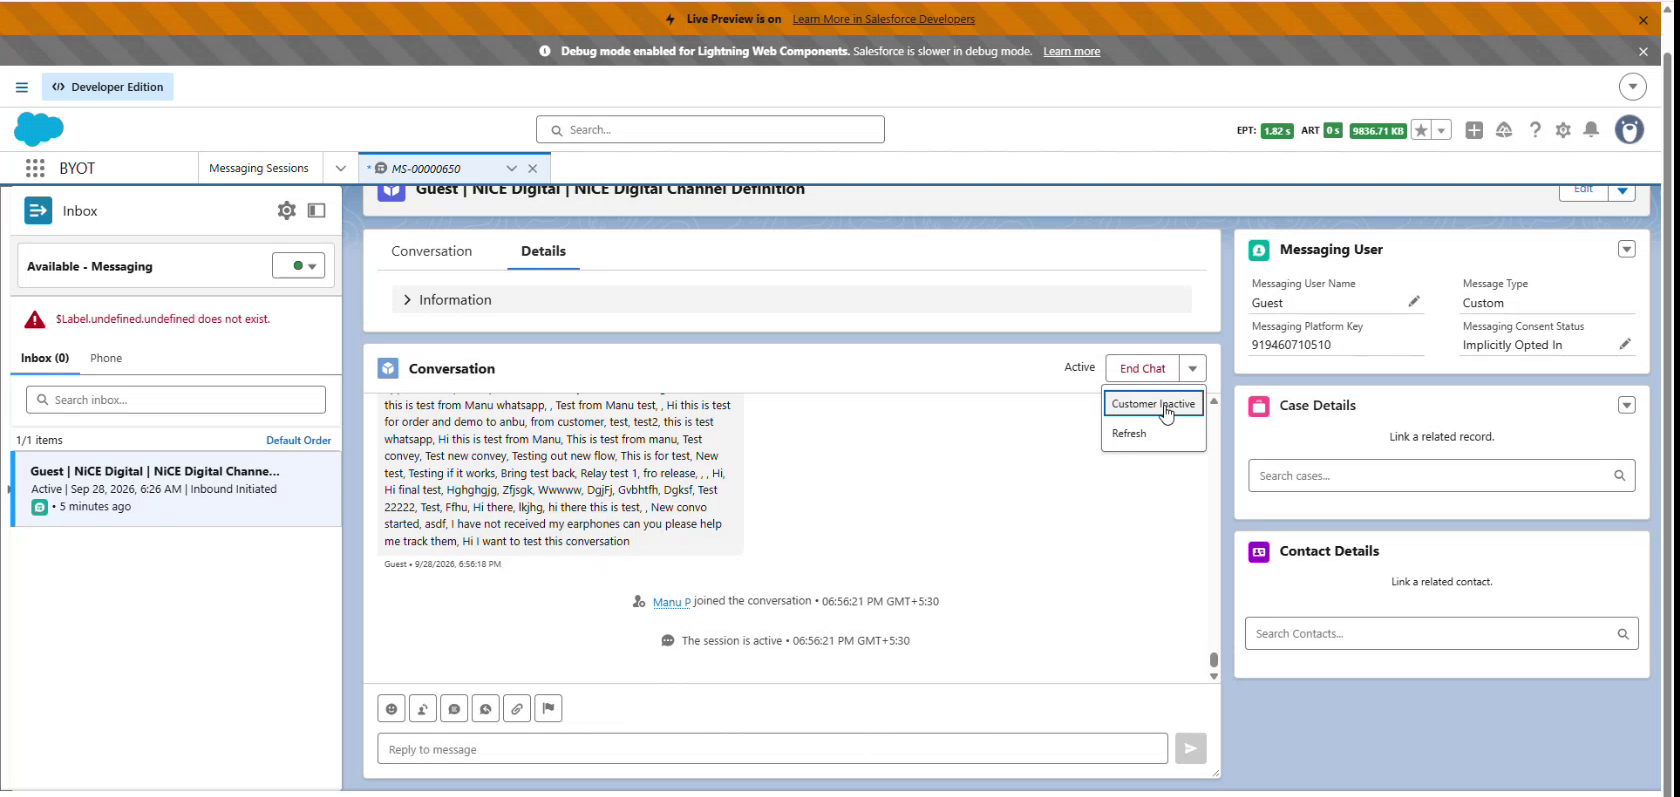
In an open messaging session, click the dropdown arrow next to End Chat.
-
Choose Customer Inactive to end the session because the customer stopped responding, or choose Refresh to refresh the conversation.